Crafting Your Own Wooden Signage: A Beginner's Guide
So, you're thinking about adding some rustic charm or a touch of professional polish to your home or business with a custom wooden sign? That's fantastic! Wooden signs offer a unique blend of warmth, durability, and visual appeal that's hard to beat. And the best part? You don't need to be a woodworking whiz to create your own stunning piece. This guide will walk you through the process, step-by-step, making it easy even for complete beginners. Get ready to unleash your inner artisan!

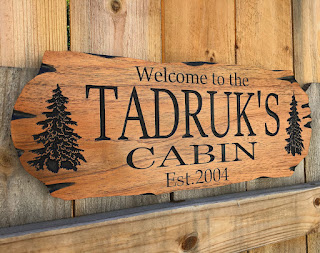
Choosing Your Wood and Design
Before you even think about picking up a saw, let's talk about the foundation of your masterpiece: the wood itself. There are so many options out there, it can be a little overwhelming! Here's a quick breakdown to help you choose:
Types of Wood:
- Pine: A classic, readily available, and affordable choice. It's relatively soft, making it easy to work with, but can be prone to dents and scratches. Great for beginner projects!
- Cedar: Known for its beautiful reddish hue and naturally resistant to rot and insects. A bit pricier than pine, but the longevity is worth it, especially for outdoor signs.
- Reclaimed Wood: Adds a unique character and sustainable touch. Each piece has its own story, resulting in a truly one-of-a-kind sign. Just be sure to check for any nails or hidden surprises before you start working!
- Plywood: A more stable and less expensive option, especially for larger signs. It's not as visually appealing as solid wood, but it's perfect for painting or decoupage techniques.
Once you've chosen your wood, it's time to brainstorm your design! Consider:
Design Considerations:
- The message: What do you want your sign to say? Keep it concise and impactful. Less is often more.
- Font style: Choose a font that complements the rustic feel of the wood. Think classic serif fonts or simple, bold sans-serif options.
- Size and shape: Consider the location of your sign and its surroundings. A large sign might overwhelm a small space, while a small sign might get lost in a larger area.
- Finishing touches: Will you add any extra embellishments? Perhaps some rope, metal accents, or a distressed finish?
Gathering Your Supplies
Now for the fun part – shopping! You'll need a few essential tools and materials. Don't worry, you probably have some of them already tucked away in your garage or shed.
Essential Tools:
- Measuring tape and pencil: Accuracy is key!
- Saw (hand saw, jigsaw, or circular saw): Choose the saw that best suits your skill level and the type of wood you're using. A jigsaw is generally a good all-around option for beginners.
- Sandpaper (various grits): Essential for smoothing out the edges and creating a flawless finish.
- Drill (optional): If you're planning on adding any hanging hardware.
- Clamps (optional): Helpful for holding pieces together while the glue dries.
Essential Materials:
- Wood of your choice: Make sure it's the right size and thickness for your project.
- Wood stain or paint: Choose a color that complements your design and home/business aesthetic.
- Paintbrushes or rags (for staining): Use quality brushes for a professional look.
- Stencils or lettering guides (optional): Make lettering easier, especially for beginners.
- Hanging hardware (optional): Think screws, hooks, or wire.
- Wood glue (optional): If you're working with multiple pieces of wood.
- Sealer (optional, but recommended): Protects your sign from the elements and enhances its durability.
Building Your Sign: A Step-by-Step Guide
Alright, let's get our hands dirty! This is where the magic happens. Remember to always prioritize safety – wear safety glasses and take your time.
1. Prep the Wood:
Measure and cut your wood to the desired size and shape. Use your chosen saw carefully and accurately. Once cut, sand the edges smooth using different grits of sandpaper, starting with a coarser grit and finishing with a finer grit for a super smooth surface.
2. Apply the Design:
This is where your creativity shines! If you're using stencils, carefully apply them to the wood and paint or stain over them. If you're freehanding, use a pencil to lightly sketch your design onto the wood before adding your paint or stain. Take your time to ensure accuracy.
3. Staining or Painting:
Apply your chosen stain or paint evenly using a brush or rag. Let it dry completely, following the manufacturer's instructions. Multiple coats might be needed for a rich color.
4. Add Finishing Touches:
Once the paint or stain is dry, add any embellishments, such as rope or metal accents. Attach your hanging hardware carefully, ensuring it's securely fastened.
5. Seal (Optional but Highly Recommended):
Apply a wood sealant to protect your sign from the elements (especially important for outdoor signs). This will also enhance the color and make it more durable. Follow the sealant's instructions for drying time.
Hanging Your Sign
Congratulations! You've created your own beautiful wooden sign. Now it's time to find the perfect spot to showcase your handiwork. Make sure you select a location that complements your sign and is visible to others. Use appropriate hanging hardware and take necessary safety measures to ensure your sign is securely attached.
Frequently Asked Questions (FAQs)
Q: What kind of paint is best for wooden signs?
A: Acrylic paints are a popular choice for wooden signs because they are durable, easy to use, and come in a wide variety of colors. Exterior-grade paints are best for outdoor signs.
Q: How do I prevent my wooden sign from warping?
A: Choosing a wood type that is less prone to warping, such as cedar or a well-constructed plywood, is important. Also, make sure the wood is properly dried before you start your project and apply a sealant to protect it from moisture.
Q: Can I use a template for my design?
A: Absolutely! Using stencils or printable templates is a great way to achieve neat, precise lettering. You can even find free templates online!
Q: How long does it take to complete a wooden sign project?
A: The time it takes varies depending on the size and complexity of your sign, but most projects can be completed in a few hours to a couple of days. Allow sufficient drying time for paints, stains, and sealants.
Q: What if I make a mistake?
A: Don't worry, everyone makes mistakes! For minor imperfections, sanding and repainting might be enough. For larger mistakes, you might need to start over, but it's a learning experience!
Now go forth and create your amazing wooden sign! Happy crafting!


0 comments:
Post a Comment